How to : Per App VPN with Citrix Endpoint Management and Citrix VPN

With the iOS per app-VPN feature, you can leverage the VPN profile in conjunction with the Citrix VPN app on a XenMobile-managed iOS device. There, you can establish an on-demand VPN tunnel to the enterprise network for a desired set of applications installed on the device.
Below, you’ll find steps that will help you enable per-app VPN using XenMobile server and Citrix VPN.
Pre-Requisite: To start with, you will need to make sure you have a XenMobile (10.3.5) environment up and running.
There are 6 steps:.
- Decide an application for which you want to enable VPN and manage it in XenMobile.
- Define an app inventory policy on the XenMobile server.
- Define a credentials provider policy on the XenMobile server.
- Define a VPN policy on the XenMobile server.
- Define an app attribute policy on the XenMobile server.
- Define a trigger policy on the NetScaler server.
Step 1: Managing an application that needs per-app VPN
Once you device to which application you want to enable pre-app vpn on the iOS device, you will need to manage it in the XenMobile server. For illustration purposes, I will use GoToMeeting as the application that needs access to enterprise network.
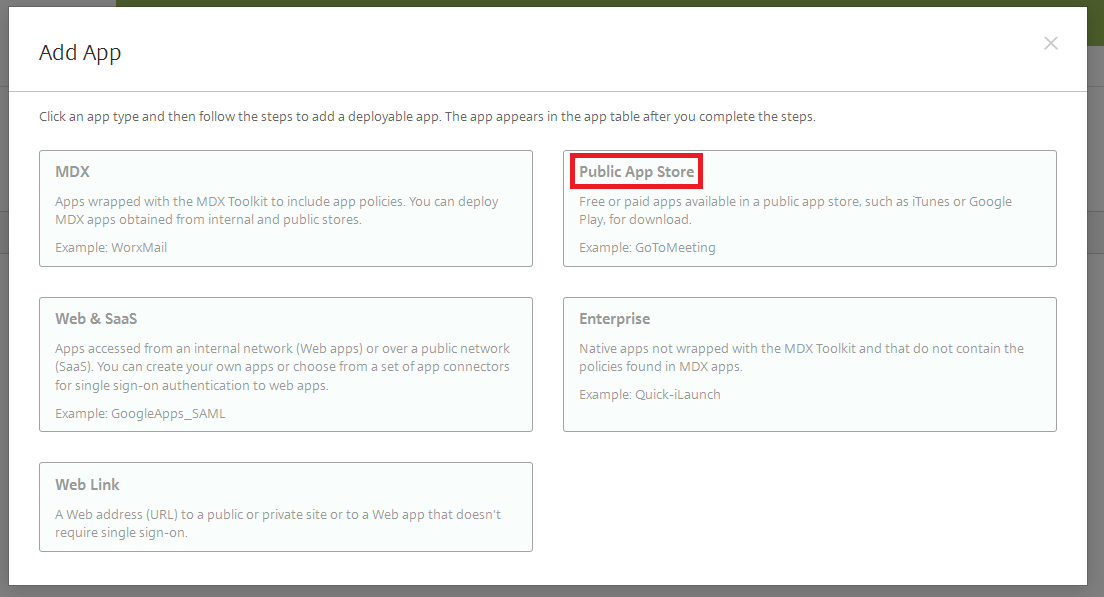
1. Login to XenMobile server, post login navigate to Configure > Apps and click on Add.

2. Under Add App page, click on Public App Store.
Note: You can also choose an enterprise application that is not published in the App Store.
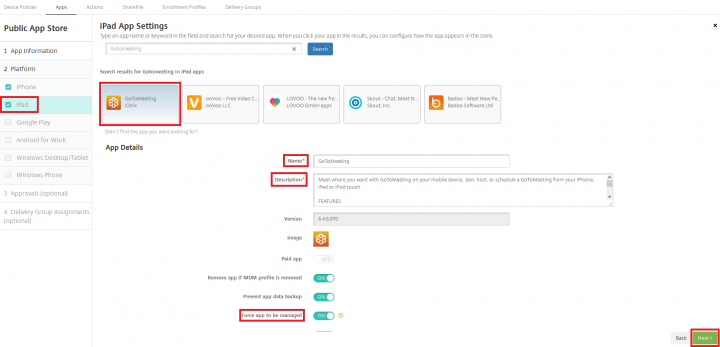
3. Provide the Name of the application, description and Click Next.
Note: Make sure you only have iPhone and iPad selected, as this is specific to iOS devices.

4. Search for GoToMeeting from the public app store, select the GoToMeeting application, verify/modify the name and Description, set the “Force app to be managed” flag to ON and click Next. Repeat the same step for iPad and Click Next.
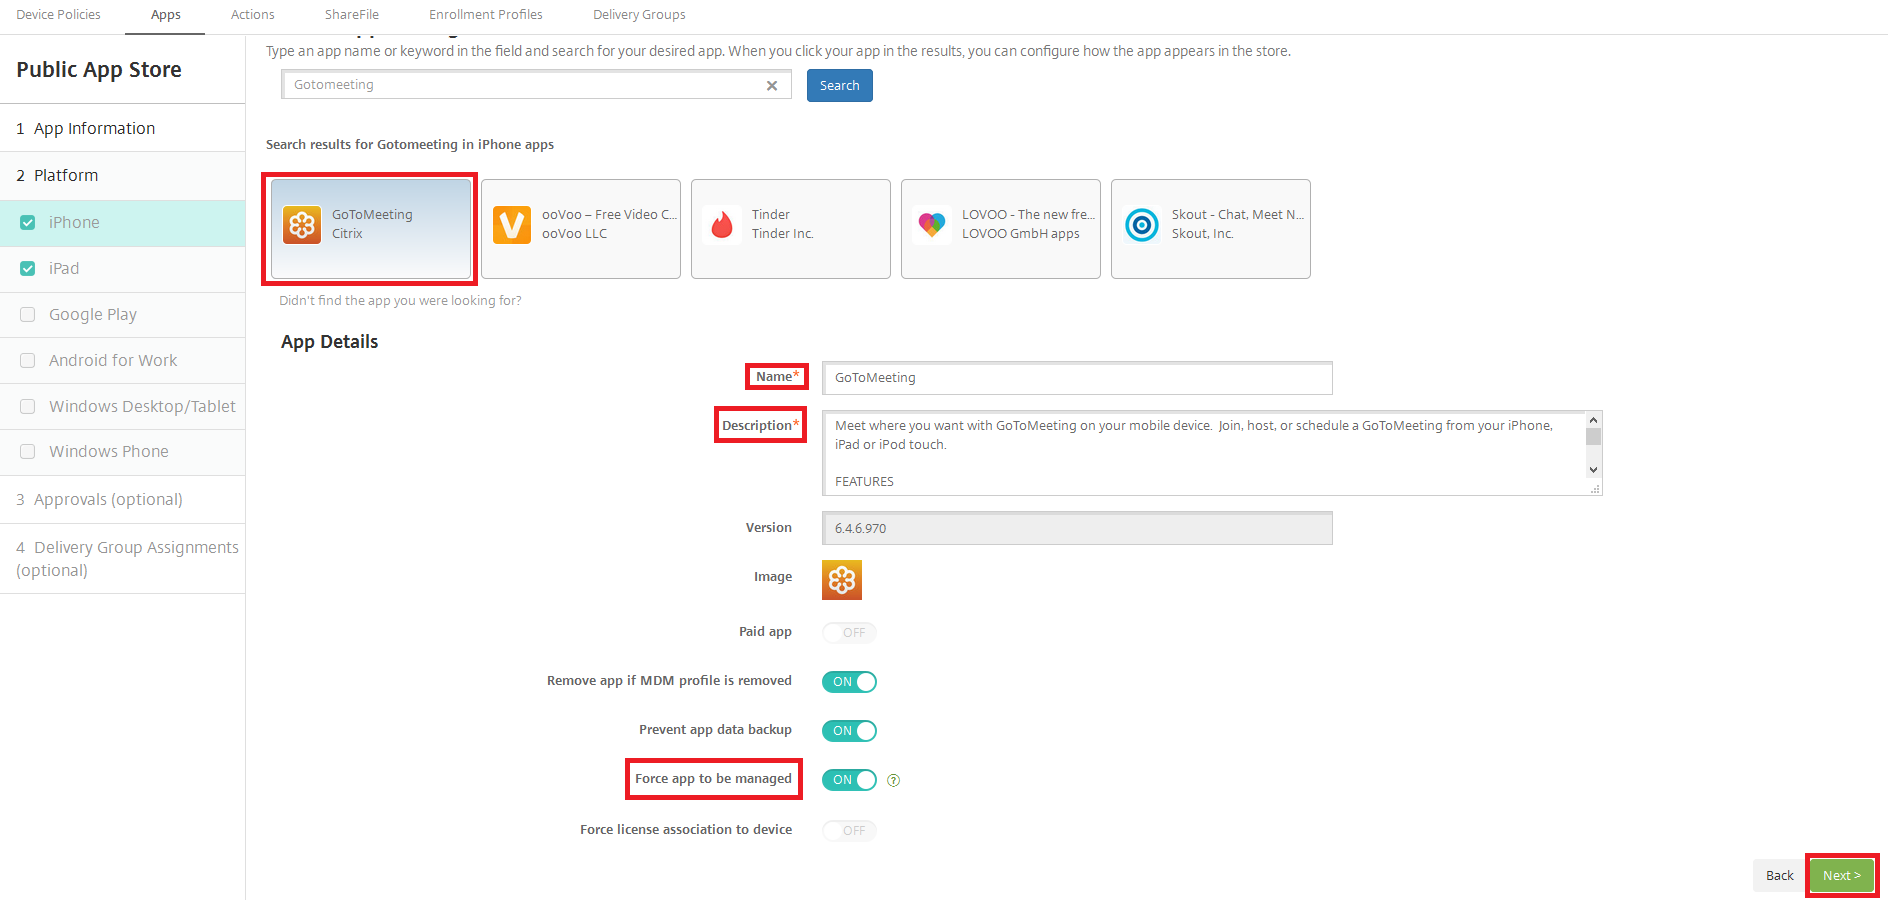
5. Click on Delivery Group Assignment, select the delivery group to which you want to deploy this policy and Click Save.
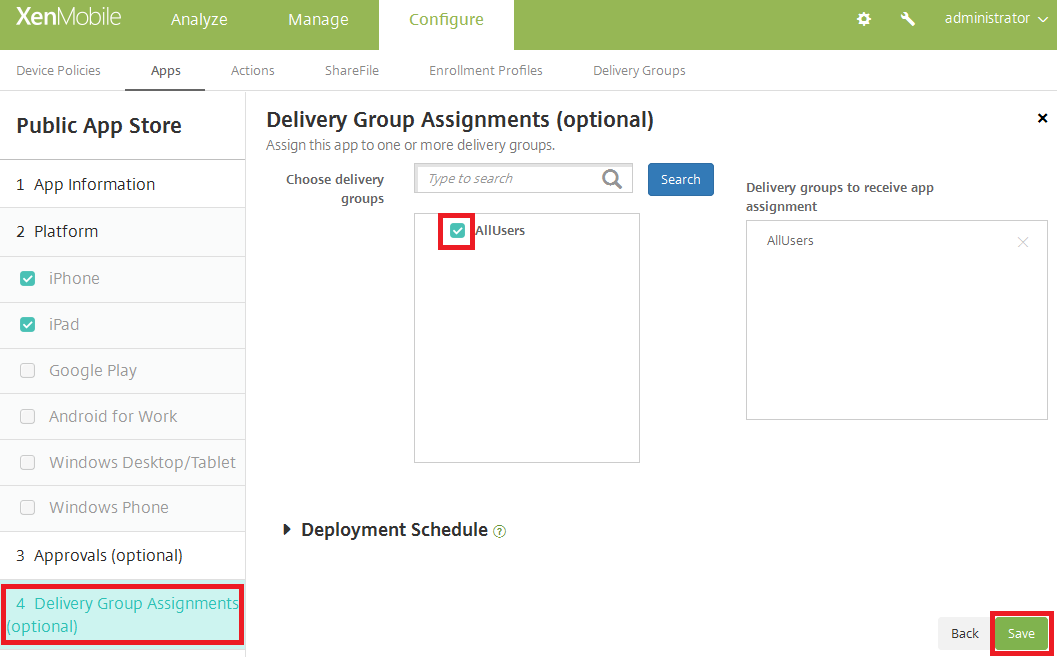
Note: Similarly, you can also push Citrix VPN application on to the users device. If not you will need to instruct the end user to install the app manually from App Store(without which you will not be able to trigger the per-app VPN).
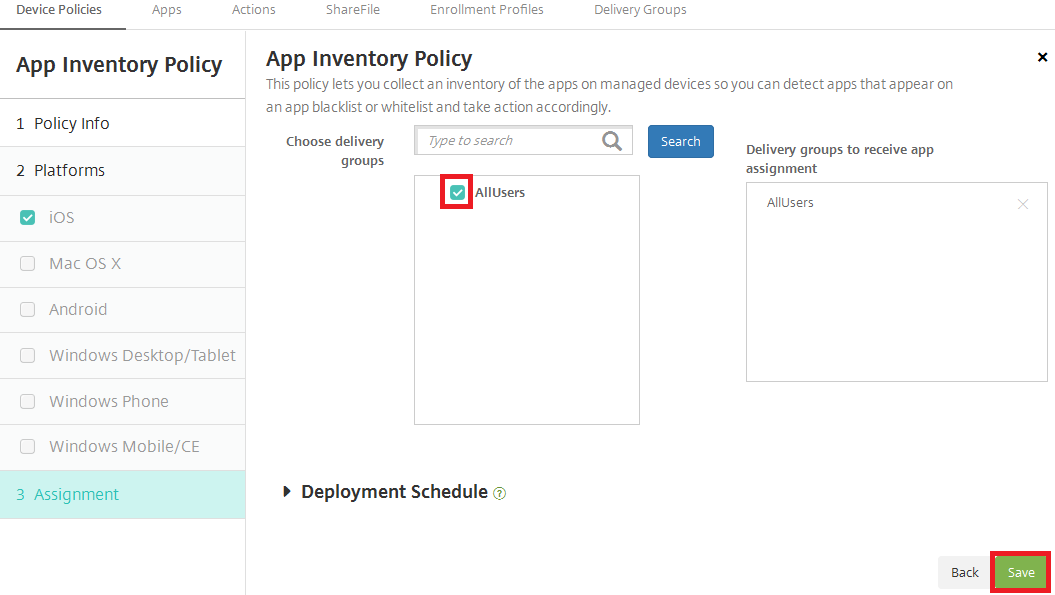
Step 2: Configuring an App Inventory Policy
Here, we will define App Inventory policy which will get the list of apps and their app ids installed on the device, Once the device manager has the app id’s then it knows which apps are managed and to which apps it needs to push the per-app VPN policy.( based on the config that we do in the next steps).
1. In Admin console, navigate to Configure > Device Policies and click on Add.
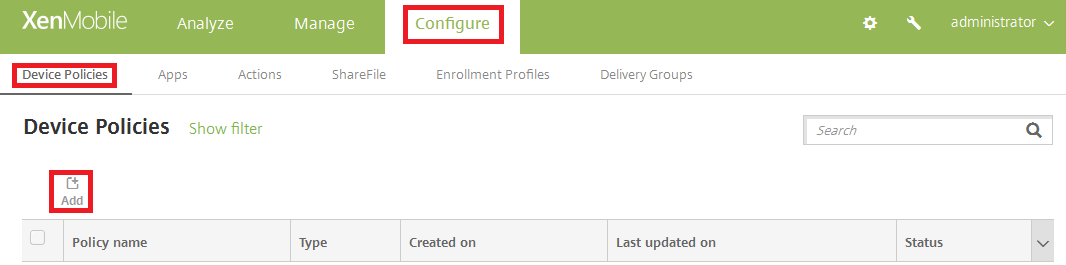
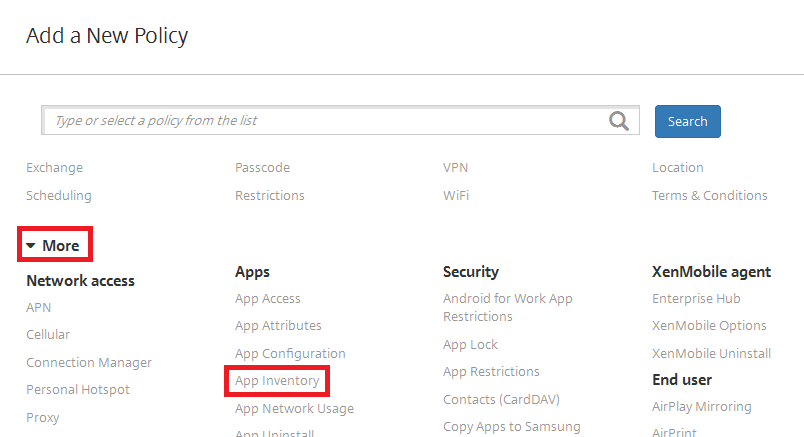
2. Under Add a New Policy pane, expand More and Click on App Inventory.
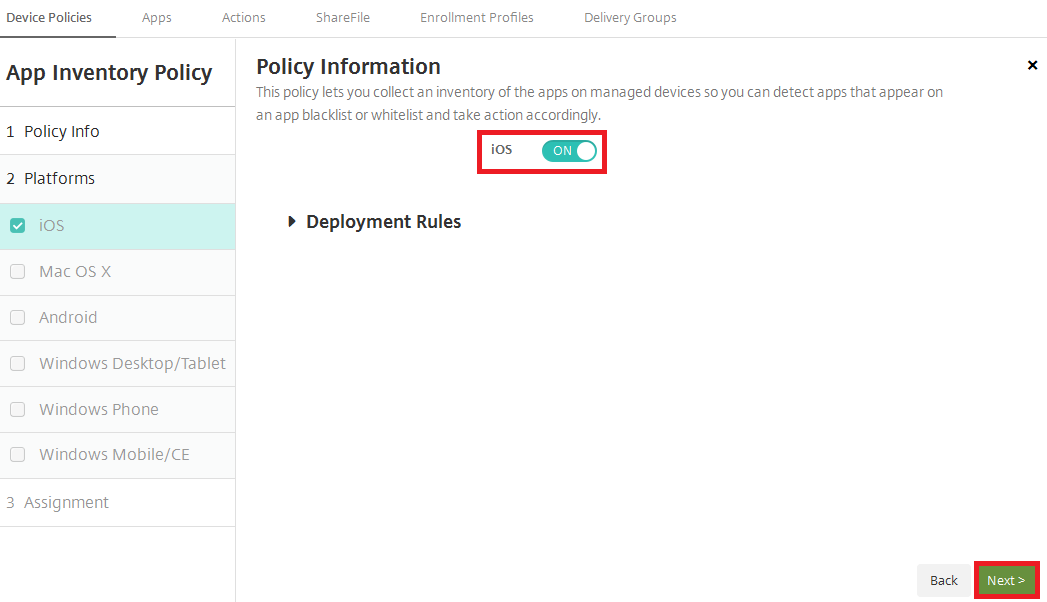
3. Under App Inventory Policy tab, select iOS Platform and set the iOS policy to ON and click Next.
4. Under Assignment, select the required delivery groups and click Save.
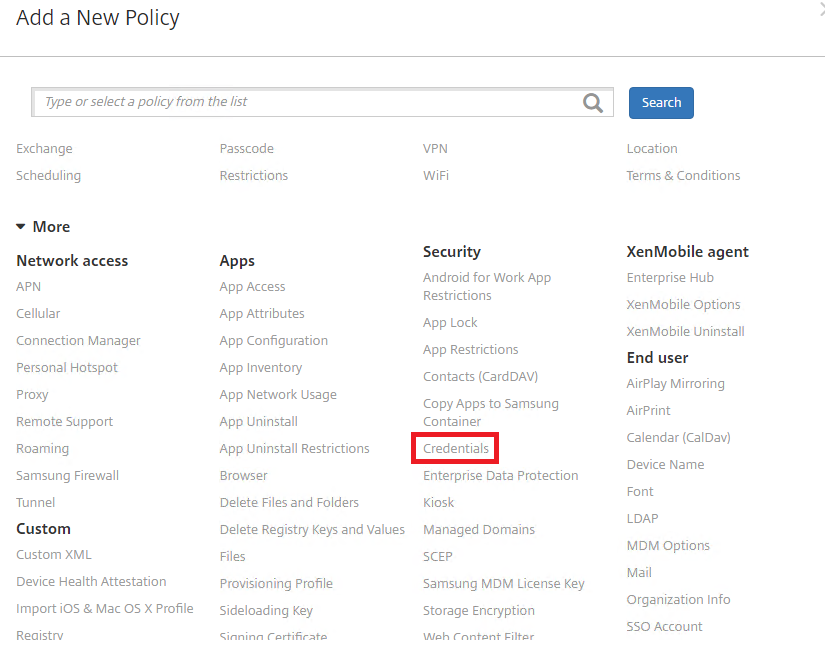
Step 3: Configuring a Credentials Provider Policy
Here we will define a Credentials policy, defining the requirement of certificate for VPN policy.
Note: This step is only needed if you are using “Certificate based authentication” in XenMobile server or “LDAP + Certificate based authentication”. If you are using only LDAP based authentication then you do not need to this step.
1. In the admin console, navigate to Configure > Device Policies and click on Add.
2. Under the Add a New Policy pane, expand More and Click on Credentials.
3. Under the Credentials Policy, select iOS Platform, in the right hand side pane provide the Policy Name and click Next.
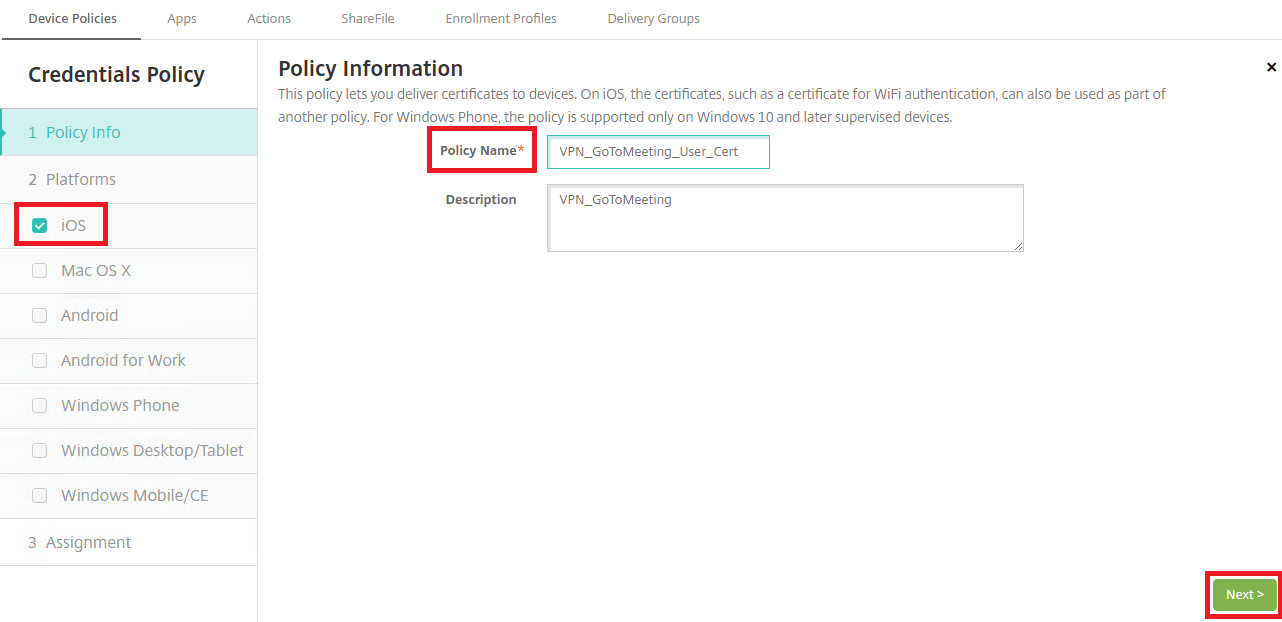
4. Set the Credential type as Credentials provider from the drop down, Select the respective Credentials provide(which you have configured for certificate based authentication) from the drop down and click Next.

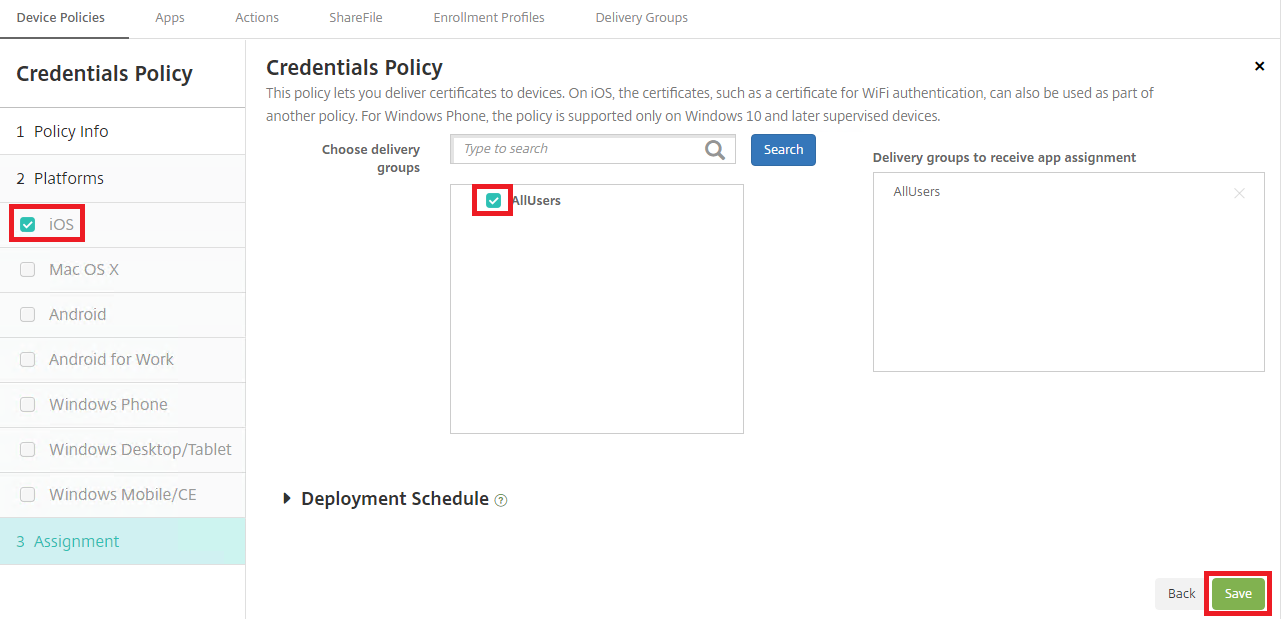
5. Under Assignment, select the required delivery groups and click Save.
Step 4: Configuring a VPN Policy
Here we will define a VPN policy.
1. In the Admin console, navigate to Configure > Device Policies and click on Add.
2. Under the Add a New Policy pane Click on VPN.
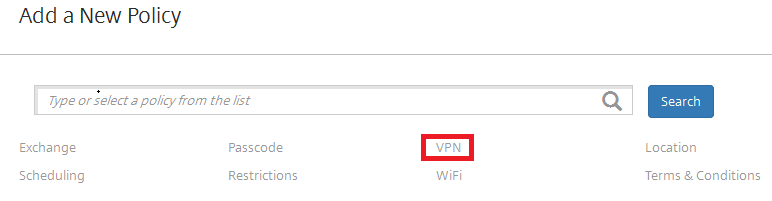
3. Under VPN Policy, Select the iOS Platform, In the right hand side pane provide the Policy Name and click Next.
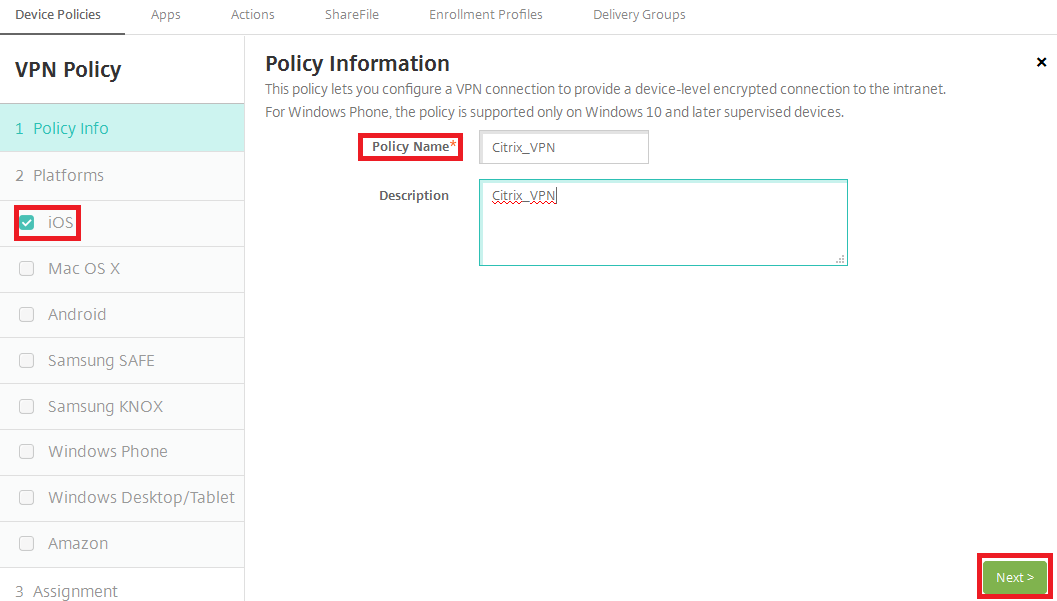
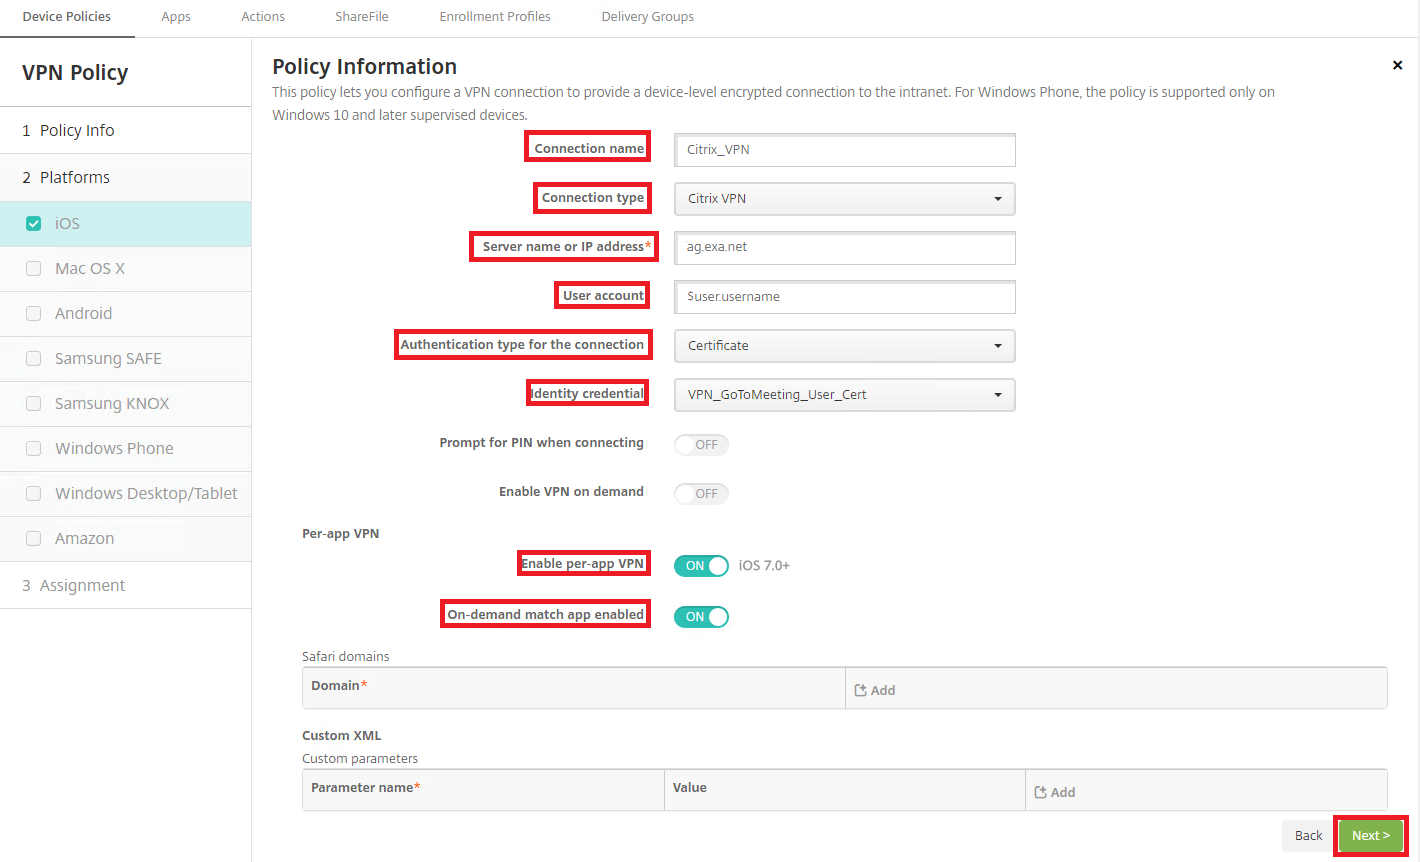
4. Provide the policy information, as referenced below, and click Next.
“Connection name” = Any custom Name
“Connection type” = Citrix VPN
“Server name or IP address” = NetScaler FQDN(to which Citrix VPN app needs to establish the VPN connection)
“User account” = $user.username
“Authentication type for the connection” = certificate (if you using only LDAP based authentication in XenMobile server then select Password from the drop down).
“Identity credential” = select the policy credentials policy that you have created in the step 3.
“Enable per-app VPN” = ON
“On-demand match app enabled” = ON
Note: If you want to tunnel the traffic for any of your internal domains from Safari browser then you can define the same under Safari domains.
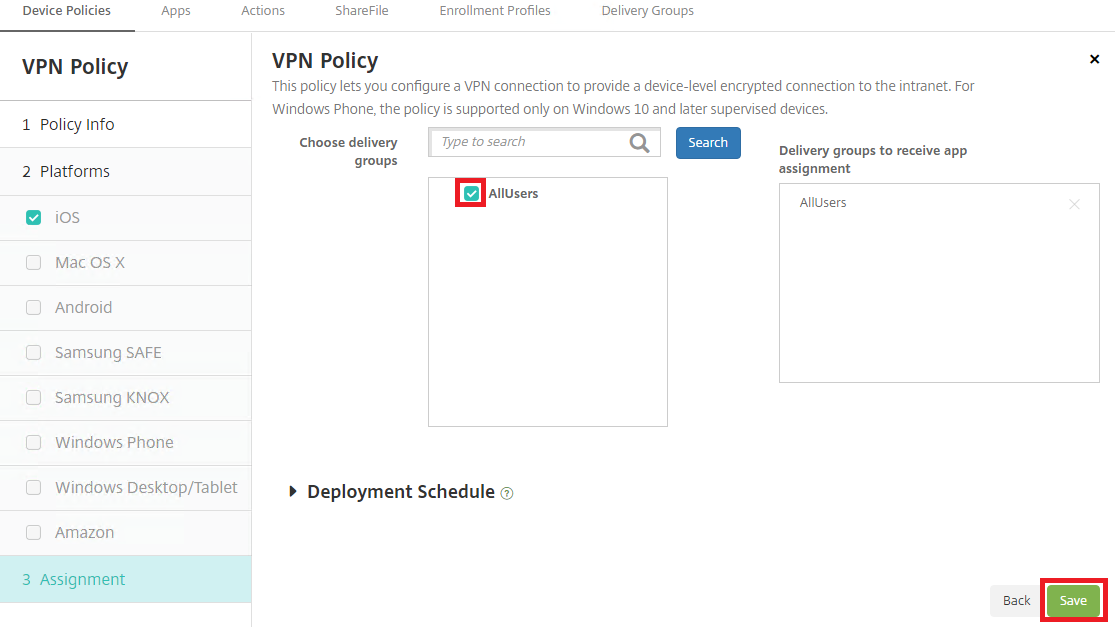
5. Under Assignment, select the required delivery groups and click Save.
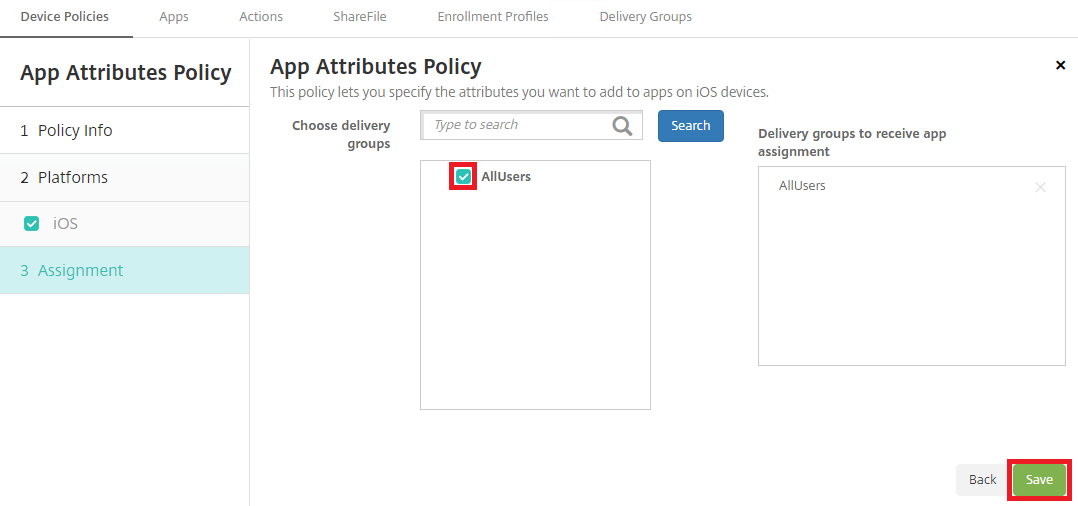
Step 5: Configure App Attribute Policy
Here we will define VPN App Attribute.
1. In the Admin console, navigate to Configure > Device Policies and click on Add.
2. Under the Add a New Policy pane, expand More and Click on APP Attributes.
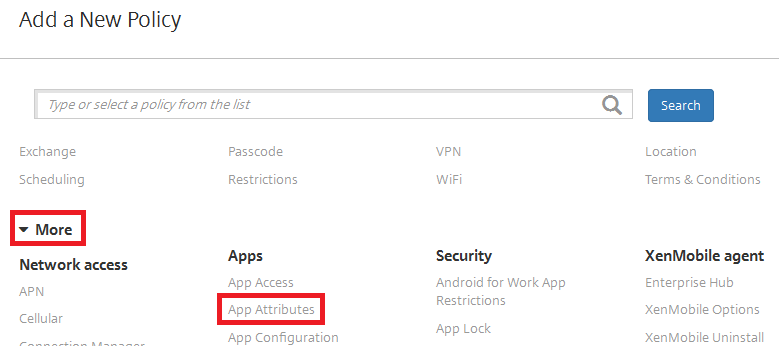
3. Set the Managed app bundle ID from the drop down(which you have defined in step 1) and set the Per-app VPN identifier (which you have defined in step 4), click Next.
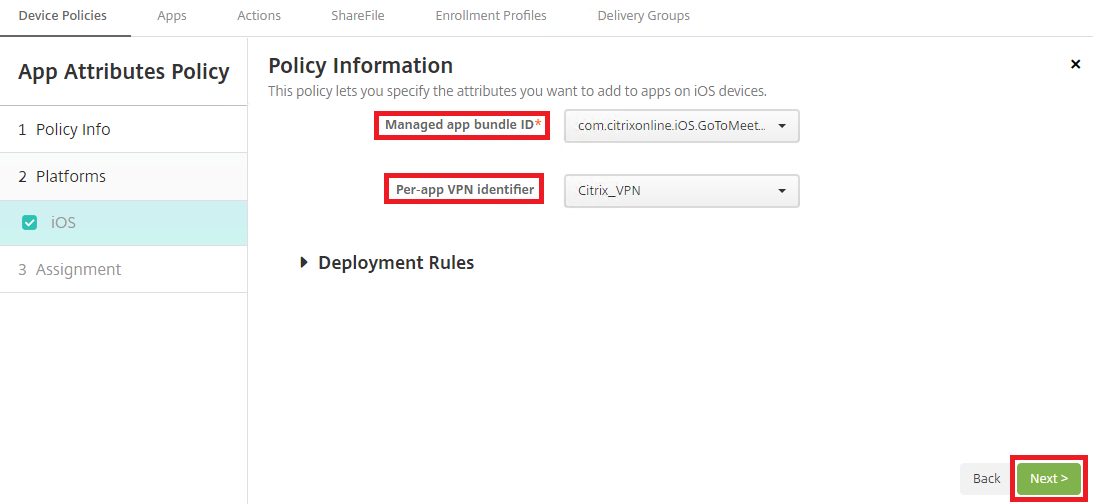
4. Under Assignment, select the required delivery groups and click Save.
Step 6: Configure NetScaler to accept the traffic from Citrix VPN app.
Here, we will define a session policy which will be used to allow/route the traffic from Citrix VPN app to NetScaler Gateway. For illustration purposes, I have used the XenMobile NetScaler Gateway to which the Citrix VPN application will establish the tunnel (make sure the Gateway URL that you have configured in Citrix VPN policy in step 4.4 and the configurations that you are going to do in below steps are one and the same).
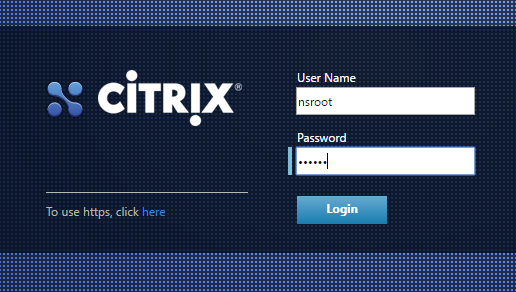
1.Login to NetScaler.
2. Post login, Navigate to NetScaler Gateway tab > Virtual Servers > from the right hand side pane select and Edit the XenMobile Gateway.
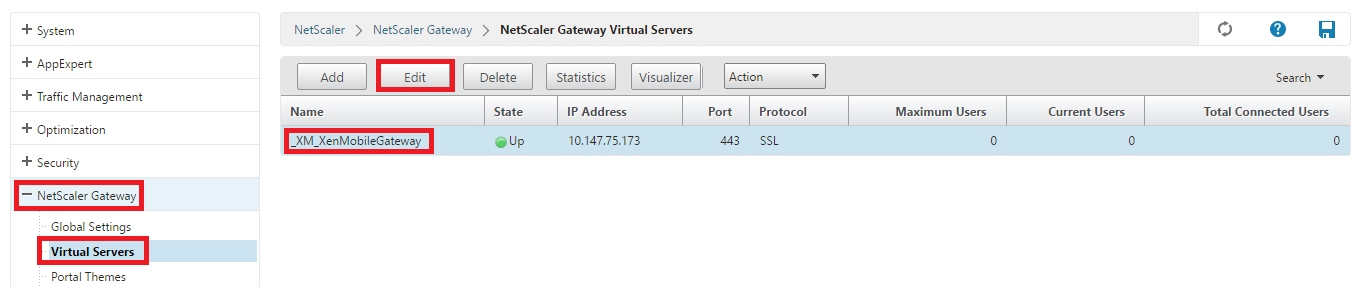
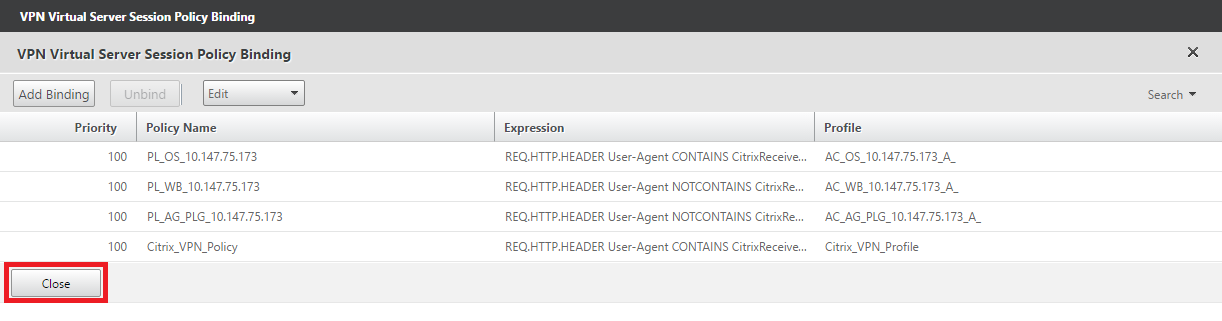
3. Under the VPN Vserver page, scroll down to Policies section and click on Session Policies.

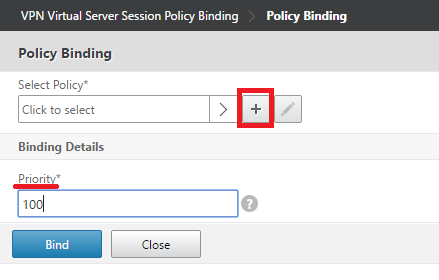
4. Under VPN Virtual Server Session Policy Binding, click on Add Binding.

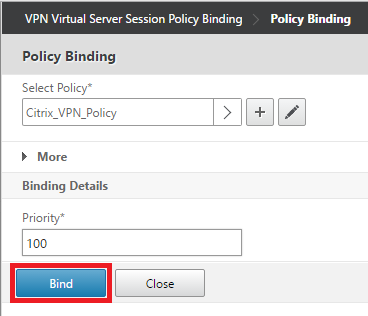
5. Under Policy Binding, set the Priority (same as the other session policies) and click on the “+” button to create a new Policy.
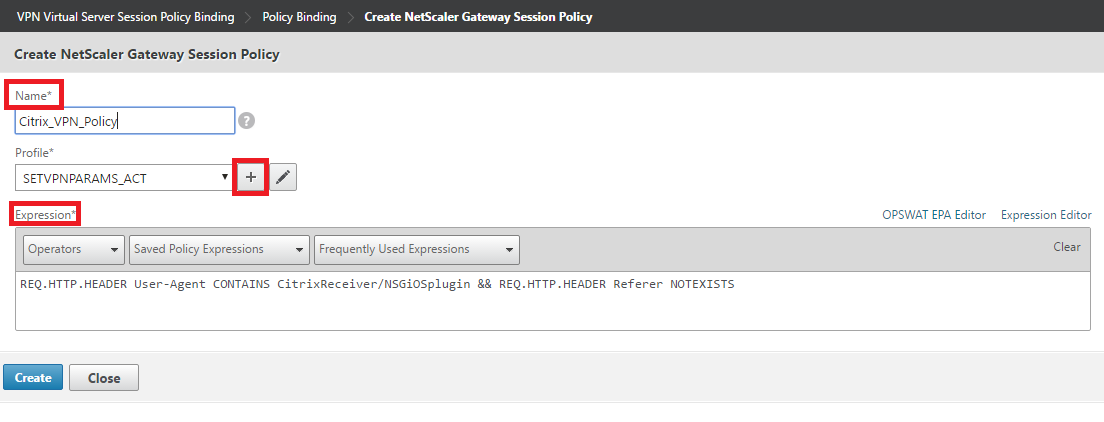
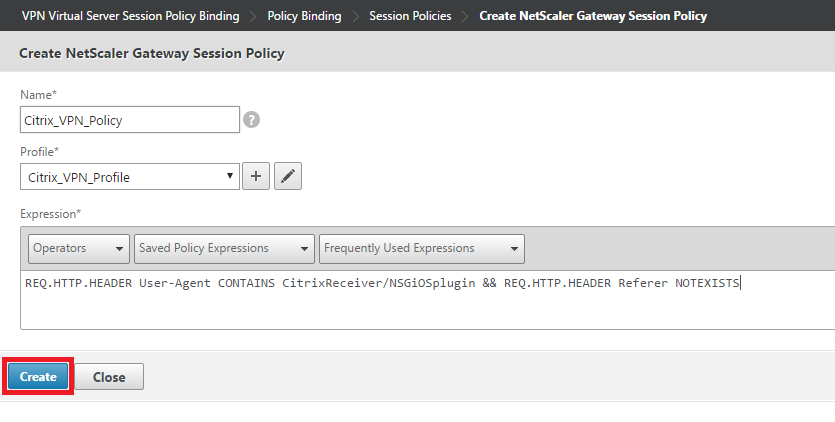
6. Provide the Name of the policy, set the expression as “REQ.HTTP.HEADER User-Agent CONTAINS CitrixReceiver/NSGiOSplugin && REQ.HTTP.HEADER Referer NOTEXISTS” and click “+” to add a new session profile.
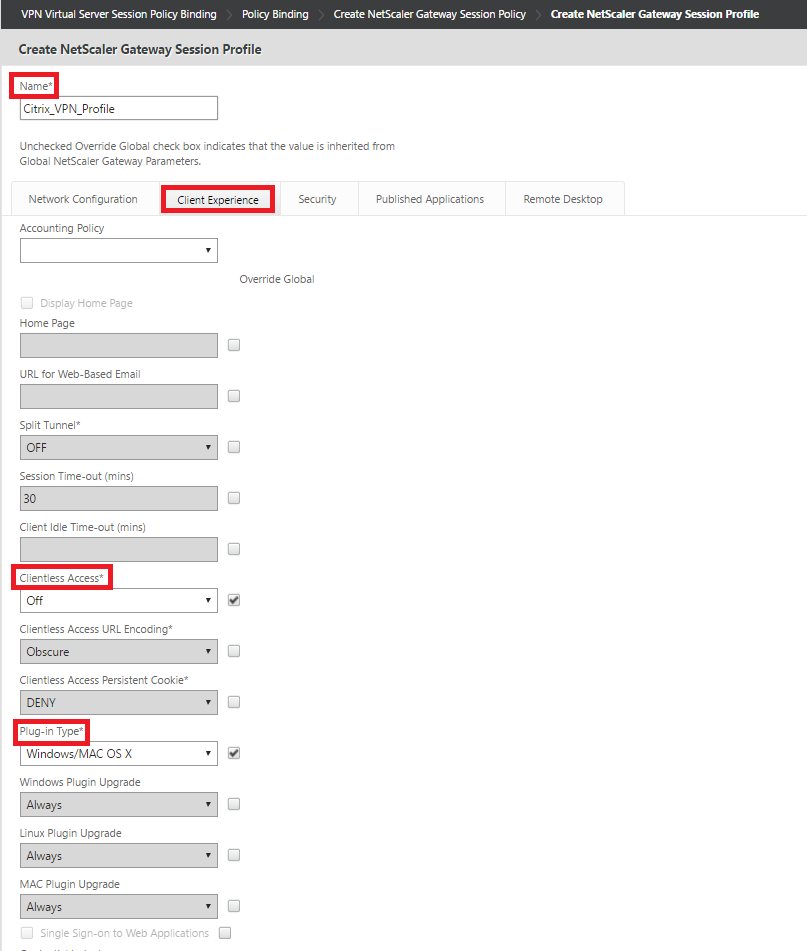
7. Under Create NetScaler Gateway Session Profile, provide the Name of the Profile and click on Client Experience tab and check Override Global check box for “Clientless Access” and set it to Off from the drop down, check Override Global check box for “Plug-in Type” and set it to “Windows/MAC OS X” from the drop down.
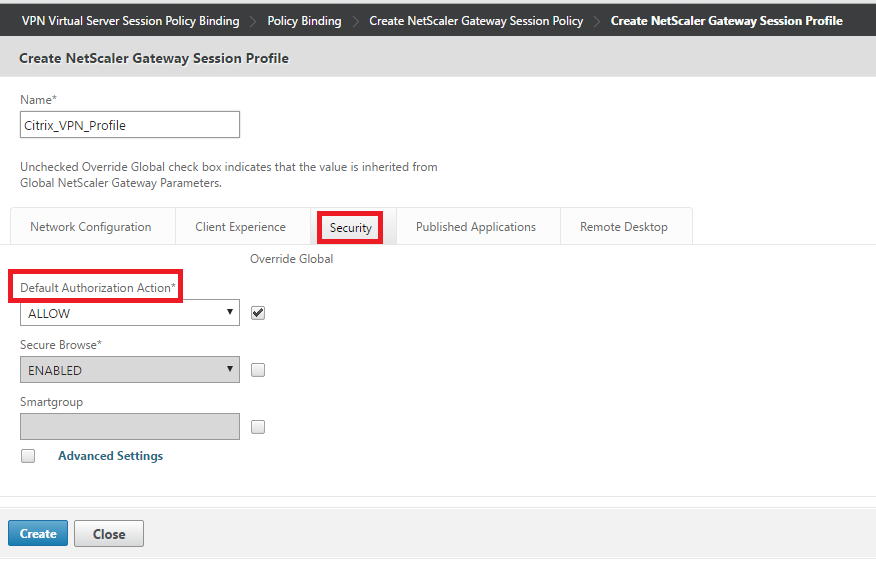
8. In the same page, now click on Security tab and check Override Global check box for “Default Authorization Action” and set it to “ALLOW” from the drop down.
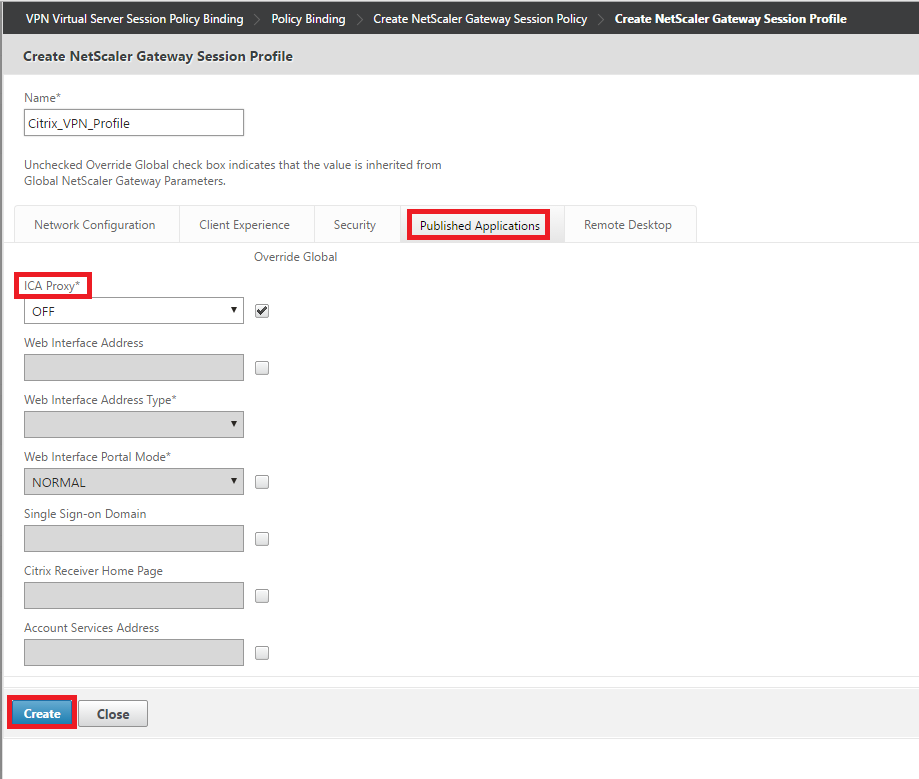
9. In the same page, now click on Published Applications tab and check Override Global check box for “ICA Proxy” and set it to “OFF” from the drop down and click Create.
10. Click Create on Create NetScaler Gateway Session Policy page.
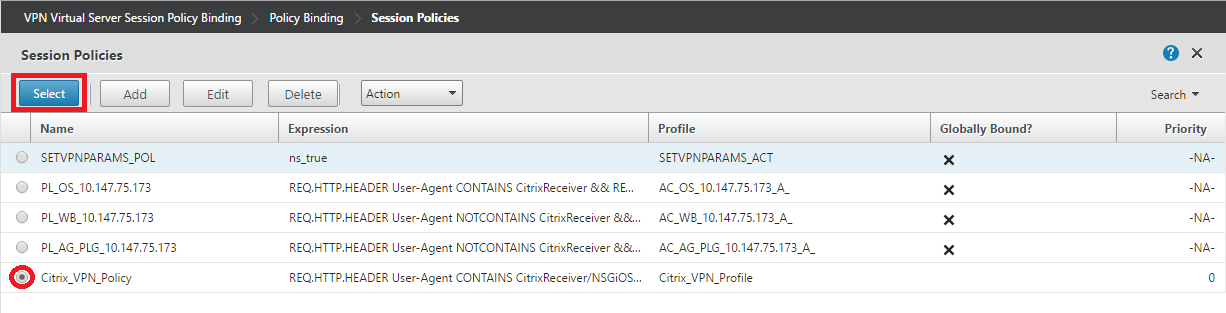
11. Under Session Policies, Select the VPN Policy that you have created in the steps above.
12. Click on Bind to bind the Policy to the NetScaler Gateway Vserver.
13. Under Policy Binding page, click Close.
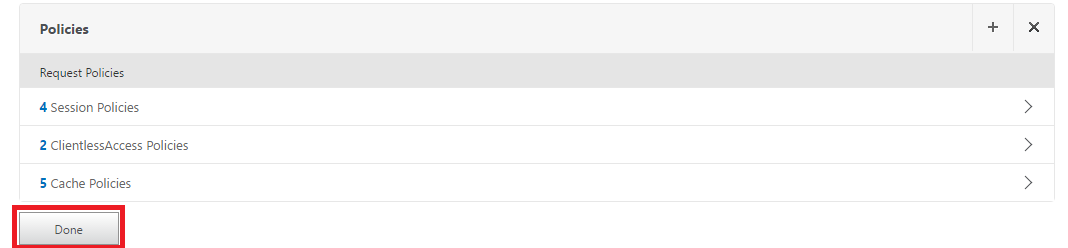
14. Under VPN Vserver page, click Done and Save the settings on NetScaler.
End User experience:
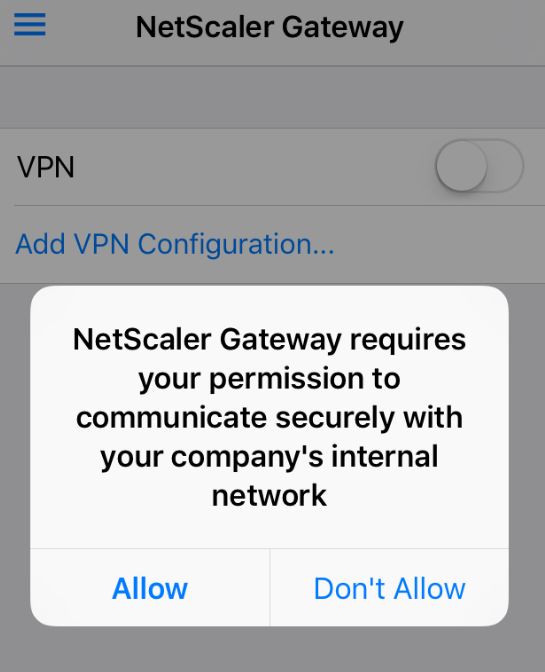
To start with, you need to make sure the Citrix VPN application is installed on the user’s device (as mentioned above you can push it from XenMobile server as part of enrollment). Upon launch, users will need to Allow NetScaler Gateway to communicate securely with Company’s internal Network.(without which user will not be able to establish VPN).
Note: Make sure, the end user is using latest version of Citrix VPN app. The older version has known issues with iOS 9 platform.
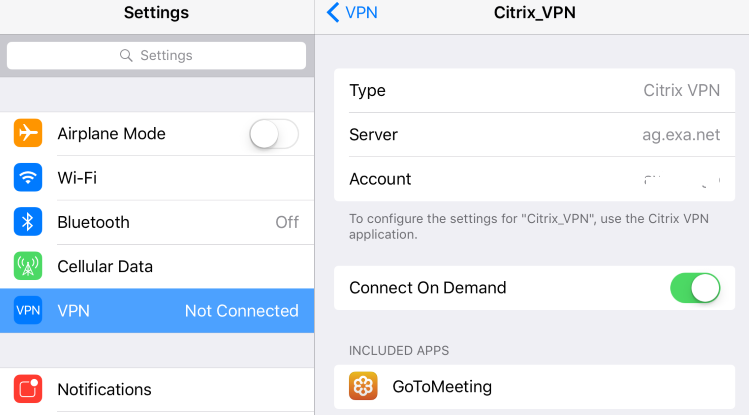
Once the User enrolls to the XenMobile server, you will also notice VPN policy being pushed on the device. Once the managed application is installed, you will see same under PER-APP VPN settings on the device.
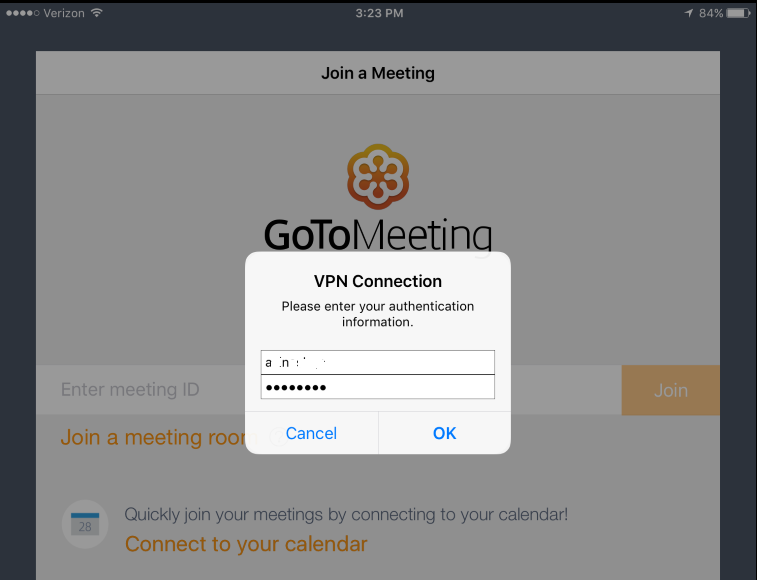
Whenever users try to access the GoToMeeting application from the mobile device, per-app VPN policy will kick in and prompt the user to enter their credentials to establish a VPN connection.
Note: You see this authentication prompt in case of LDAP only and Cert + LDAP authentication modes. You will not see this prompt if you are using only certificate based authentication in XenMobile server.
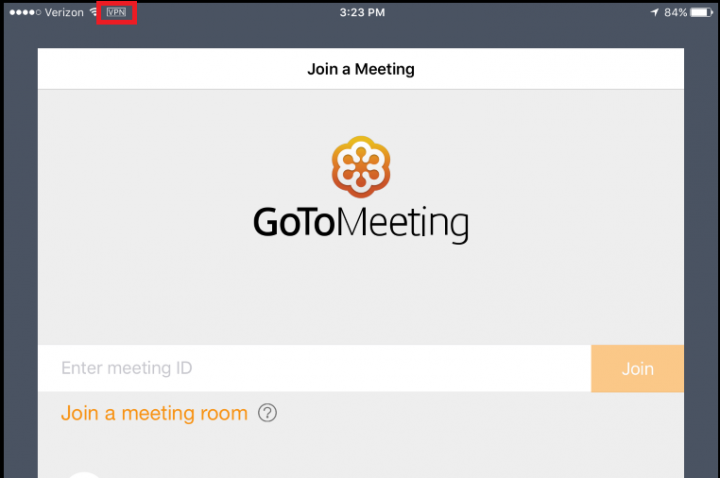
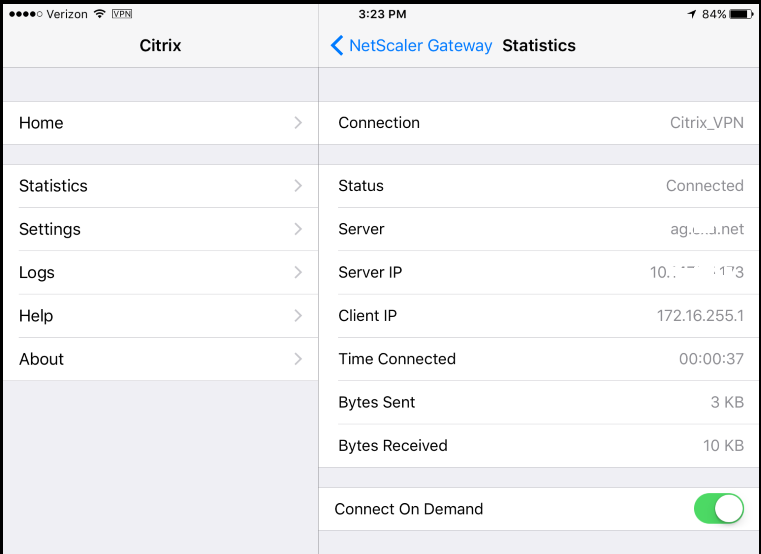
Users can confirm and monitor the device connected to VPN and the tunnel using the stats.